Tutorials
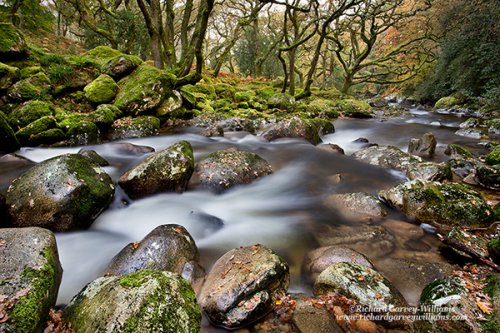
Neutral Density Filters & Their Use
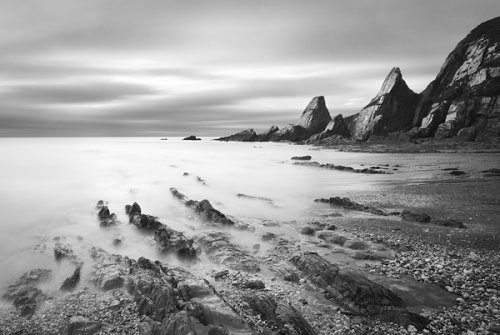
Neutral Density (ND) filters are simply sheets of dark plastic or glass that either screw onto the front of your lens or slide into a filter holder attached to your lens. They are used to absorb light entering the lens and thus to enable the use of longer exposures than would otherwise be possible. Most of the time we are trying to ensure fast enough shutter speeds to guarantee sharp shots, so why might we want to do this? Well, there are times when we actually want to blur elements within a scene for creative effect. Doing so can very much simplify an image or help elements within a scene to stand out and be noticed. It can also significantly change the impact and whole mood of an image.
Balancing Flash with Ambient Light
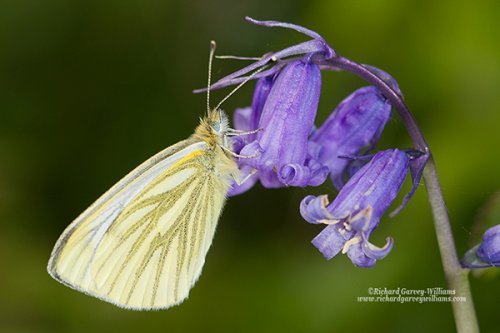
Photographing the smaller details of the natural world is a very different game to much of what we do in wildlife photography. Those who involve themselves in any close-up or macro work will know that it comes with its own challenges and often requires very different approaches, techniques and routines.
Focus Stacking
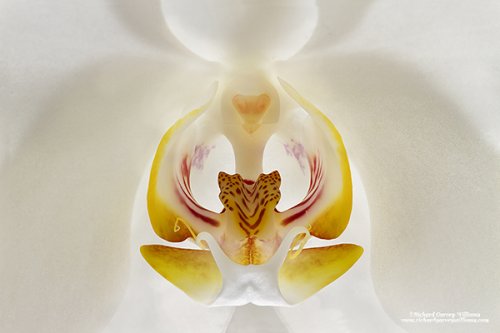
This macro shot of the centre of an orchid flower involved stacking and blending 8 images. It serves as a good example of how this technique that we'll look at in this tutorial can be employed to optimize quality when a significant depth of field is required.
Focus stacking is generally used when you need a very large depth of field. If you were to try to achieve this in a single exposure, you would require a very small aperture (probably f/20 or higher). The problem with using very small apertures is that you tend to get a softening effect due to diffraction of light as it passes the edges of the aperture blades. So, provided that the subject matter is static and that you are able to set your camera up on a tripod, a way around this is to take multiple exposures, each with a different point of focus, and then let software select out the parts of each that are in focus and blend them together to produce the final image. This is, therefore, a viable option in much architectural, landscape and macro photography.
How tight to crop?
NB. This tutorial was also published as an article in the PAGB newsletter for Sept 2015.
This is a question I touched also upon in my book ‘Mastering Composition’. One of the obvious choices we have when composing our images is how much space to leave around our subject matter. Ideally, if we are to maximise image quality we should be making our decisions at the time of capturing the image rather than getting into the habit of leaving lots of space so that we can crop into it during our image processing routines. With zoom lenses we don’t even have the excuse of having to move our legs to alter how our subject matter fills the frame. Having said this, it can be a good exercise to deliberately leave plenty of space and then play around with various cropping options on your computers to learn about their impacts and to experience the effect that the amount of space left in a 2-dimensional image can have on us.
Horizontal or Vertical?
The cameras that most of us photographers are using these days produce a rectangular image of a ratio of either 3:2 or 4:3. These slightly elongated formats are used most commonly in a horizontal orientation. This is no doubt largely due to our binocular vision, which gives us a slightly horizontally-elongated field of view of landscapes, and to the cameras themselves, which tend to be designed with horizontal shooting in mind.
Working a Landscape Image in Photoshop
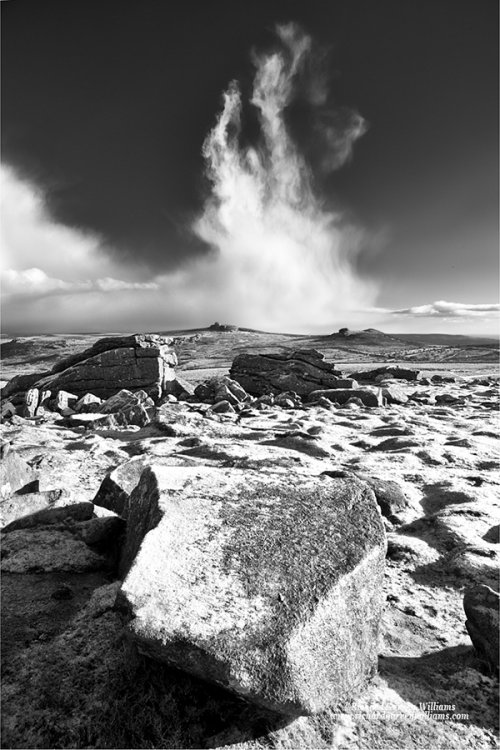
This landscape image was captured on an outing on Dartmoor this January to walk the dog. There had been a brief snow shower as I arrived that morning which had left a light dusting. I was wandering around near Top Tor and noticed some dramatic cloud formations moving rapidly across the sky. A tall ‘swirling,’ tower-like cloud particularly caught my eye, giving me the impression of a plume of smoke from an enormous fire. I quickly set the camera and tripod up to catch it as it passed between Haytor and Saddle Tor, with Top Tor in the mid-ground and the shapely rock in the foreground. I used a polarizer as the lighting was side-on and it helped set the clouds off against the blue sky. I took 2 exposures – one for the land and one for the sky at f/16 and ISO 100. In this lesson I offer some tips on blending exposures in Photoshop.
A Clouding Influence
Generally when we photographers stand before a magnificent vista setting up our tripods ready to capture the scene, the feeling engendered in us is one of awe and pleasure. Therefore in composing our landscape images we are usually looking for a balanced, harmonious composition that will also instill feelings of pleasure and peace in the minds of those who will view the photograph.
This was also published as an article in the October 2014 PAGB newsletter
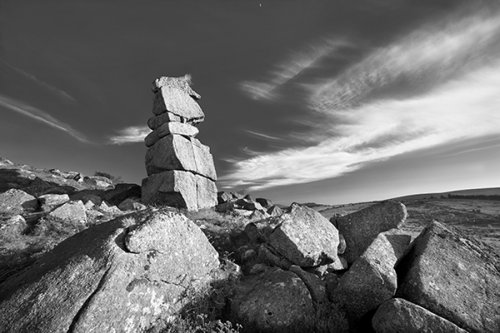
Polarizing Filters
A polarizing filter is certainly an essential feature in my photography kit bag. When the conditions are right, their effect can be like magic as they dramatically transform the scene you’re looking at through the viewfinder. This is an effect that cannot be mimicked by software, so has to come from the glass. Here are a few tips on their use...
Why Bend your Knees?
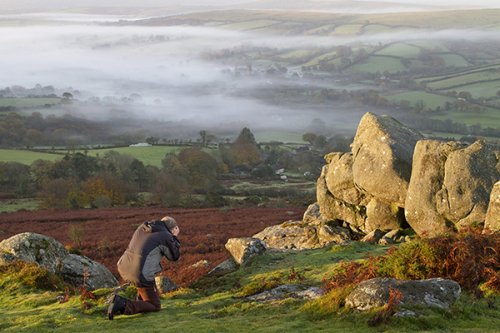
Your angle of view is so often critical to the success of your photograph. It is one of the things that will profoundly affect not only what aspect of your subject you see but also the whole composition and sense of relationship with elements within the scene.
What's the Point?
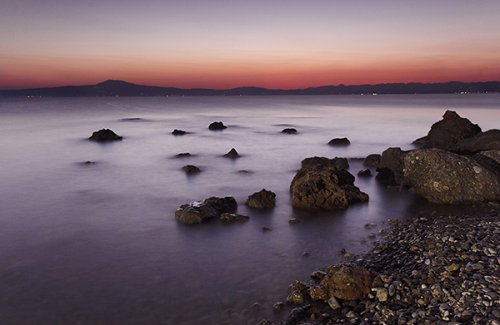
Does a photograph need a focal point? A critique session at my local photography club prompted me to raise this question here. We are all invited to take along a couple of photos and sit around in groups discussing them. One of the heads in my printer had given up the ghost, so I couldn’t take along anything recent so quickly grabbed a couple from the archives on my way out. One was this dusk seascape taken many years ago when I was just embarking on my digital photography journey whilst living in southern Greece.
Making Use of Lines
Following on from a recently posted article on ‘aerial perspective’, here I will take a look at ‘linear perspective’ and offer a few tips on using it to convey depth in our photographs. Most architectural and landscape photographers will know that lines in a two-dimensional picture can also give an impression of three dimensions and thus depth. This perception is based on the fact that we know that parallel lines receding into the distance (such as the tracks of a train) appear to converge towards the horizon.
Conveying Depth through Aerial Perspective
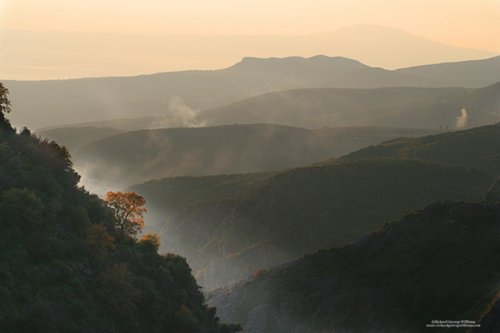
Like other visual artists whose product is two-dimensional, photographers would do well to consider and study perspective. This is the process by which we suggest three dimensions on a two-dimensional surface by recreating the appearance and spatial relationships that objects or a scene in recession present to the eye. An understanding of this process and how we can deduce and perceive depth from a 2-dimensional representation can help us to actively convey this quality. Like other visual artists whose product is two-dimensional, photographers would do well to consider and study perspective. This is the process by which we suggest three dimensions on a two-dimensional surface by recreating the appearance and spatial relationships that objects or a scene in recession present to the eye. An understanding of this process and how we can deduce and perceive depth from a 2-dimensional representation can help us to actively convey this quality.
Very Brief Moments in Time

This brief article on catching emotions or interactions in wildlife photography was published in the PAGB newsletter 143 which can be seen at www.pagbnews.co.uk/newsletter/issue-143 - click on the image of the front cover.
A Frame within the Frame
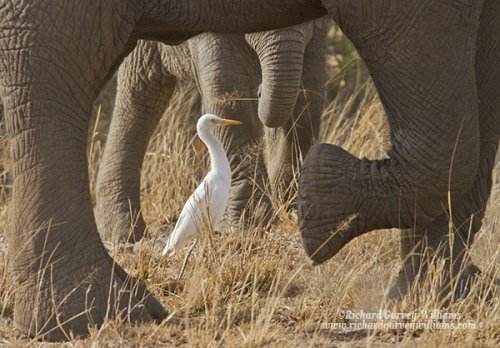
Objects and shapes in a scene can also be used to provide a natural frame for the subject. In effect this creates a frame within the frame of a photograph and a stronger ‘window’ to peer through. This can help to enhance the subject matter, localize it and draw attention to it. The frame doesn’t have to be complete – a partial surround will often serve the purpose. A few tips...
A Willing Accomplice
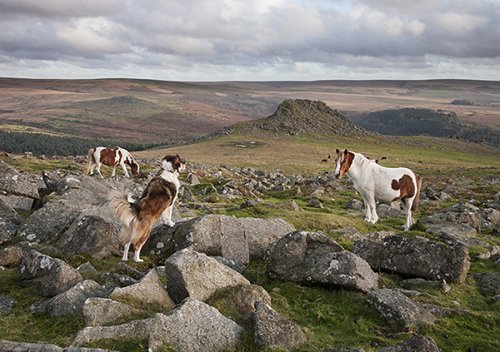
I often take our dog, Rosy, on my outings onto Dartmoor. At least if the shoot is not productive, I can return home knowing I’ve given the dog a good walk! Fortunately, she loves the moor and entertains herself whilst I busy myself trying to compose a shot. She’ll often climb the tors without encouragement and clearly enjoys the open views from the rocks. Fortunately, she also comes equipped with a thick fur coat and doesn’t appear to feel the cold at all – I’m often envious as we return to the car, my hands numbed by the bitingly cold wind.