Tutorials
Working a Landscape Image in Photoshop
I could probably have used a single exposure and manipulated the tones in the image to come up with something similar, but it would have required larger adjustments to lighten and bring detail back into darker areas and to darken the brightest parts of the sky and snow. These grosser adjustments bring with them more image degradation in terms of noise and the risk of posterisation. Having 2 exposures enabled me to optimize the image quality. I could also have used a graduated filter, of course – probably a 2-stop soft grad, but in this instance I would have missed this composition by the time I had fitted it.
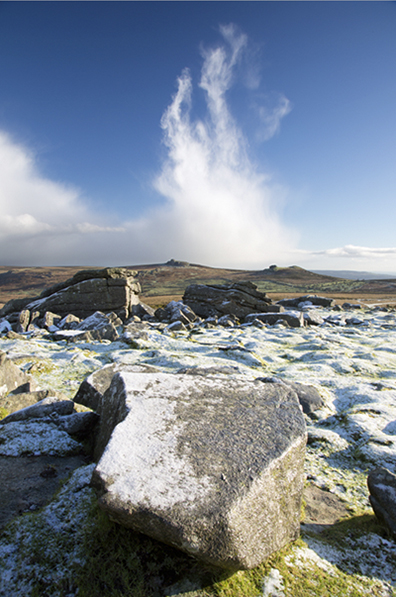
Here’s an outline of the processing I did back home to enhance the image, balance the tones and emphasize what drew me to taking the photographs in the first place. The RAW images:


The first job was to convert the 2 Raw files to tiffs that I could then work on in Photoshop. So in Adobe Camera Raw, I set both to the same white balance. In this case they required no exposure or tonal adjustments and I simply added a little Fill Light (+8) to the land one to put some detail into the shadows cast by the rocks.
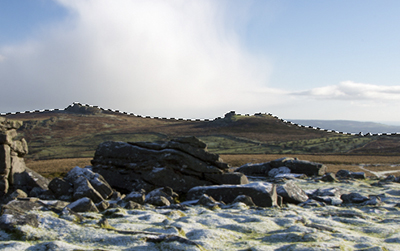 I then opened both in Photoshop and stacked the darker/sky version on top of the lighter/land version. I checked their precise alignment and added a layer mask. I then selected the sky using the magic wand tool.
I inverted the selection so that it was a selection of the land, contracted it by 1 and feathered by 1. This helps prevent any light haloes appearing in the sky along the horizon margin when you go on to lighten the land. A black brush was then used to paint over the selected area, the land to reveal the lighter layer below and use the data from that exposure. I then removed the selection, zoomed in to 100% and checked along the horizon margin where the selection line had been looking for any fringing along the margin due to slight irregularity of the selection. In this case it was fine, but often it’s necessary to used a white brush of low opacity to gently paint over these to disguise any fringing. A white brush of 30% opacity was used, however, to paint over the brightest parts of the foreground snow to darken these again and avoid any burn out (there was a little in the lighter exposure version).
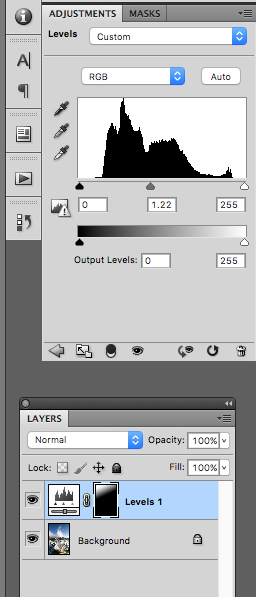
Next, I decided to even the tones in the blue sky. These were slightly graduated due to the use of a polarizer with a relatively wide angle lens. I used a Levels Adjustment Layer, moving the mid-tone marker to the left to lighten the scene. I then inverted the mask and used a gradient white to black on the mask to lighten the top left hand corner of sky.
I then opted to increase the contrast in the clouds to give them a little more dimension. A Curves Adjustment Layer served this purpose. With the hand icon (top left of curves palette) selected, I clicked on a slightly darker part of the central column of cloud and dragged it downwards slightly to darken this tone. This also brought out the blue in the sky nicely. I used the mask to undo this to varying degrees in the areas where it wasn’t required (the darkest parts of the sky and the bulk of the land area).
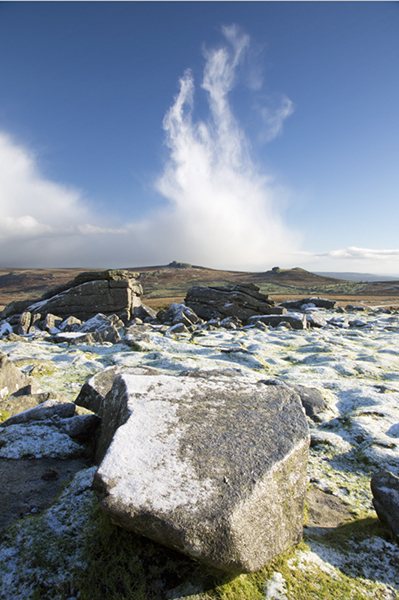
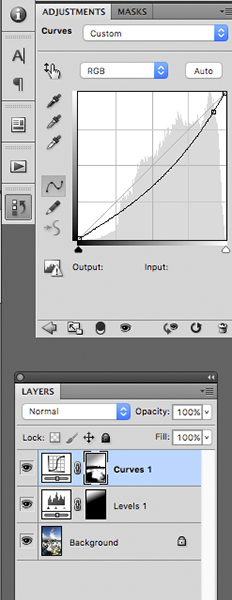
I repeated a very similar adjustment to further this contrast enhancement in the right-hand part of the towering cloud that still looked a little flat.
Next I needed to brighten the distant land and tors to make these a more dominant feature in the image and the shadow areas of the mid-ground tor. I used a Levels Adjustment layer to effect this and the mask to undo it where not required.
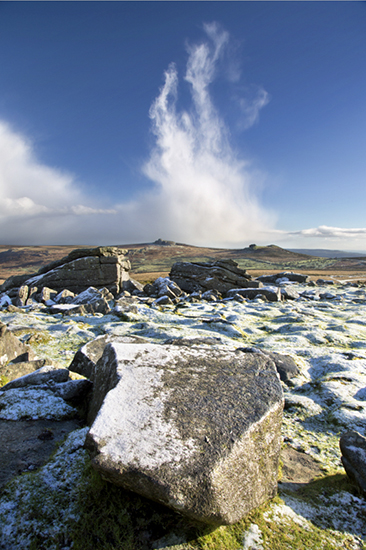
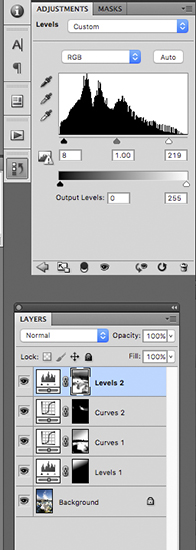
Finally, I just darkened down the sky above the horizon on the right using another Levels Adjustment layer and mask.
I then flattened the layers and zoomed in to 100% to check for fringing. There was a slight red-cyan fringe evident peripherally at high contrast edges, so I went to Filter>Lens Correction and zoomed in to 100% and moved the slider to +35 to resolve this and then flattened the image again in the layers palette.


The black and white conversion was performed using Nik Software’s Silver Efex Pro. A red filter was added to darken the blue sky to make the cloud formation the dominant part of the image. (Grab 9). In Photoshop, a little ‘dodging’ was done over patches of snow to brighten it further – with dodge tool set to highlights and exposure to 4%.